
Laminate flooring offers a beautiful and budget-friendly alternative to hardwood or tile. But how do you transform those planks into a stunning new floor? Fear not, DIY warriors! With the right preparation and this comprehensive guide, you can achieve professional-looking laminate flooring in your home.
Before You Dive In: Planning and Preparation
Choosing Your Weapon (Flooring):
Laminate flooring comes in a variety of styles, thicknesses (measured in millimeters), and AC ratings (indicating wear resistance). Here’s a quick breakdown to guide your selection:
- Style: Laminate mimics the look of wood, stone, or tile. Consider the existing décor and desired ambiance when choosing a style.
- Thickness: Generally, thicker laminate (8mm or above) offers better durability and noise reduction.
- AC Rating: For high-traffic areas, opt for AC3 or higher ratings. Lower ratings are suitable for bedrooms or low-traffic areas.
Gather Your Arsenal (Tools and Materials):
- Laminate flooring planks (enough to cover your square footage with at least 10% extra for waste)
- Underlayment (moisture barrier specific to laminate flooring)
- Circular saw or miter saw for cutting planks
- Jigsaw (for cutting around curved objects)
- Rubber mallet for tapping planks together
- Pull bar and tapping block (for tight spaces)
- Spacers (to maintain consistent gaps between planks and walls)
- Utility knife
- Pencil and tape measure
Prepping the Battlefield (Subfloor):
Laminate thrives on a clean, flat, and dry subfloor. Here’s how to ensure your subfloor is ready:
- Remove existing flooring: Rip up carpets, tiles, or old laminate. Ensure proper disposal of removed materials.
- Check for subfloor suitability: Laminate can be installed over most subfloors like concrete, plywood, or vinyl tiles. Uneven concrete may require leveling, while damaged subfloors might need repairs or replacement.
- Moisture check: Use a moisture meter to ensure the subfloor is below the recommended moisture content level (usually below 12.5%). High moisture can damage laminate flooring.
Installing the Underlayment (Laying the Foundation):
Underlayment provides cushioning, moisture protection, and sound insulation.
- Roll out the underlayment: Start at the farthest corner from the door and roll out parallel to the planned plank direction. Overlap seams by 4 inches and secure them with underlayment tape.
- Cut around obstacles: Use a utility knife to carefully cut the underlayment around pipes, doorways, or other fixed objects.
Laminate Flooring Installation: The Main Event
Planning the Layout:
For a seamless look, plan your layout before diving into installation. Start by laying out several rows of planks without clicking them together to visualize the overall look. Here are some tips:
- Decide on a plank starting point (often the longest wall) and direction (usually parallel to the light source).
- Consider staggering plank ends for a more natural appearance. Avoid starting or ending rows with short pieces near doorways.
First Row:
- Cut the tongue off the first plank: Since the first row will butt against the wall, you’ll need to remove the tongue (the protruding edge) of the first plank length-wise for a snug fit.
- Space it Out: Place spacers (usually 1/4 inch) between the wall and the first plank row to allow for expansion.
Subsequent Rows:
- Angled Assault: Hold the new plank at a 45-degree angle and insert the short end’s groove into the long end’s tongue of the previously laid plank.
- Lock it In: Gently push the plank down until it clicks into place. Repeat for subsequent planks in the row.
- Tapping Technique: For stubborn connections, use the tapping block and rubber mallet to gently tap the plank’s short end until it clicks shut.
Tight Spaces and Cutting:
- Measure Twice, Cut Once: Measure the remaining space accurately before cutting the final plank in a row. Use a jigsaw for curved cuts around obstacles.
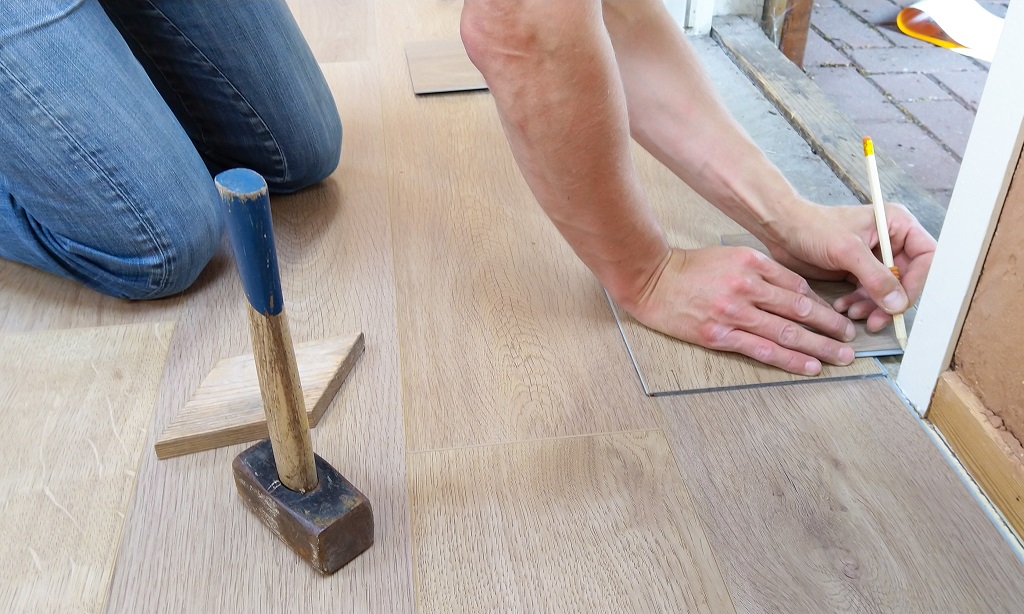
- End Row Maneuvers: The last row might require some creative cutting due to limited space. Flip the plank and trace the adjoining plank’s edge onto the backside. Cut along the traced line to ensure a perfect fit.
Trimming Around Doorways and Fixed Objects
Here’s a more detailed explanation of trimming laminate flooring around doorways and fixed objects:
Door Casings:
- Measure the Gap: Open the door and measure the space between the existing flooring and the bottom of the door casing. This measurement will determine how much you need to cut from the top of the plank.
- Mark and Cut: Mark the cutting line on the backside of the plank using the measurement obtained. For a clean and precise cut around the door casing, utilize a miter saw set at a 45-degree angle. Make two angled cuts – one on each end of the plank – to create a perfect L-shaped piece that will fit snugly around the door casing.
Pipes and Other Obstacles:
- Template Time: For oddly shaped obstacles like pipes, creating a template ensures an accurate cut. Place a scrap piece of laminate flooring over the pipe and trace its outline with a pencil.
- Transfer the Design: Carefully transfer the traced outline onto the backside of the actual plank that needs to be cut.
- Jigsaw Magic: Use a jigsaw to meticulously cut along the traced outline on the plank. Ensure a snug but not overly tight fit around the pipe.
Additional Tips:
- Test the Fit: Before permanently locking the trimmed plank into place, test the fit around the doorway or obstacle. This allows for minor adjustments if needed.
- Don’t Force It: Never force a plank into place. If it doesn’t fit seamlessly, re-measure and re-cut as necessary.
- Leftover Creativity: Don’t discard leftover plank trimmings right away. They can be useful for patching up minor future dings or scratches on the laminate floor.
By following these tips and utilizing the appropriate cutting techniques, you can ensure a clean and professional-looking finish around doorways, pipes, and other fixed objects, completing your laminate flooring installation seamlessly.
Finishing Touches and Post-Installation Care
Completing the Look:
- Shoe Moldings: Install shoe moldings along the baseboards to cover the expansion gap and create a polished look. Use a miter saw for clean corner cuts.
Cleaning Up:
- Sweep Away Debris: Carefully sweep away any dust or debris from the laminate surface using a soft-bristled broom.
- Vacuum Time: Use a vacuum cleaner with a soft floor attachment to remove any remaining dust particles.
Post-Installation Care:
Laminate flooring is relatively low-maintenance, but proper care extends its lifespan and beauty:
- Use Doormats: Place doormats at entryways to trap dirt and debris before they reach the flooring.
- Clean Up Spills Promptly: Wipe up spills immediately with a damp mop. Avoid using excessive water or harsh chemicals.
- Protective Furniture Pads: Adhere furniture pads to the legs of tables, chairs, and other furniture to prevent scratches and dents.
- Mop Wisely: Use a microfiber mop specifically designed for laminate flooring. Avoid abrasive cleaning solutions.
- Chair Mats: Consider using chair mats under rolling chairs to minimize wear and tear in high-traffic areas.
Congratulations! You’ve successfully transformed your space with beautiful laminate flooring. By following these steps and proper care practices, you can enjoy your new floor for years to come.
Related: How Do You Tighten a Screw That Keeps Spinning?
Additional Tips:
- Work in sections: Don’t attempt to install the entire floor at once. Work in manageable sections to avoid confusion and ensure proper alignment.
- Recruit a Helper: Having an extra pair of hands, especially for maneuvering longer planks, can significantly streamline the installation process.
- Read the Manufacturer’s Instructions: While this guide provides a general framework, always refer to the specific installation instructions provided by your chosen laminate brand.
- Safety First: Wear safety glasses and gloves while cutting planks and using the tapping block and mallet.
With careful planning, proper execution, and a touch of DIY spirit, you can achieve professional-looking laminate flooring that elevates your home’s aesthetics and functionality. So, grab your tools, unleash your inner installer, and get ready to conquer those floors!